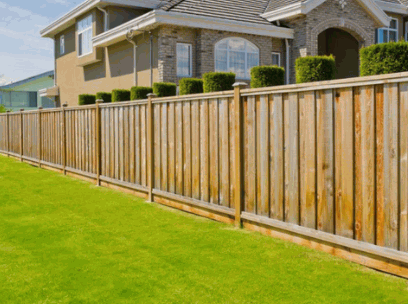
If you’re looking to enhance the privacy and security of your property, a wood fence could be the perfect solution.
Not only is it cost-effective and versatile, but it’s also relatively easy to install.
In this article, we’ll walk you through everything you need to know about installing a wood fence, from the materials and tools required to a step-by-step guide.
Whether you’re a seasoned DIYer or a novice, you’ll be able to tackle this project with confidence.
What Is A Wood Fence?
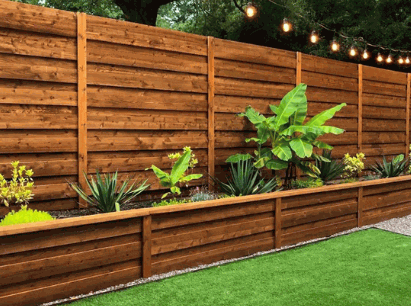
A wood fence is a traditional fencing option that offers privacy and security for your property, typically made from natural materials such as cedar or pressure-treated lumber, and is endorsed by experts.
Wood fences have been a popular choice for homeowners seeking a classic and timeless look for their outdoor spaces. The use of natural materials like cedar or pressure-treated lumber not only adds to the aesthetic appeal but also ensures durability against the elements.
One of the key advantages of a wood fence is the sense of seclusion and protection it provides. These fences create a boundary that not only marks your property but also shields it from prying eyes and potential intruders, enhancing both privacy and security.
Learn more: What Is Composite Fencing
Why Choose A Wood Fence?
Choosing a wood fence for your property is a smart decision due to its cost-effectiveness, versatility, and ease of installation.
Cost-Effective
One of the primary reasons homeowners opt for a wood fence is its cost-effectiveness, with affordable posts and materials readily available.
When compared to other fencing options, a wood fence remains an attractive choice not only due to its initial lower cost but also because of its long-term financial benefits.
The cost of materials for a wood fence, including posts and wood panels, is generally lower than materials for metal or vinyl fencing.
Wood is a versatile material that can withstand various weather conditions, reducing the need for frequent repairs and replacements, and ultimately saving homeowners money in the long run.
Versatile
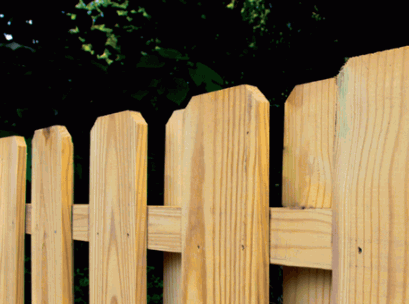
Wood fences are incredibly versatile, allowing for a range of designs and styles to suit any property.
With wood fences, homeowners can choose from a variety of options such as picket fences, privacy fences, post-and-rail fences, and more. Each design can be customized to match the architectural style of the property, whether it’s a rustic farmhouse or a modern urban dwelling. Different wood materials like cedar, pine, or redwood can be used to enhance the durability and aesthetic appeal of the fence. This versatility in design and material selection makes wood fences a popular choice for adding charm and character to outdoor spaces.
Easy To Install
The installation process of a wood fence is relatively straightforward, often requiring just a post-hole digger and some basic materials.
By following a few simple steps, anyone can successfully install a wood fence in their own backyard. One of the first things to consider is the layout of the fence and where the posts will be placed. Using the post-hole digger, holes are dug at regular intervals to accommodate the posts. Once the posts are securely in place, the horizontal rails can be attached using nails or screws. The vertical boards are nailed or screwed into the rails to complete the fence.
What Materials Do You Need To Install A Wood Fence?
Installing a wood fence requires several key materials, including wood panels, fence posts, concrete, nails or screws, and gate hardware if applicable.
Wood Panels
Wood panels form the main structure of the fence, with common options being cedar or pressure-treated lumber.
Regarding wood panels for fences, there are several types available to choose from, each with its own unique characteristics. Apart from cedar and pressure-treated lumber, other popular options include redwood, pine, and spruce. Cedar is favored for its natural resistance to insects and rot, making it a durable choice that ages beautifully over time.
On the other hand, pressure-treated lumber is treated with chemicals to enhance its resistance to decay and rot, making it a cost-effective option for those looking for longevity. It’s important to consider the maintenance requirements and environmental factors when deciding between these two popular choices.
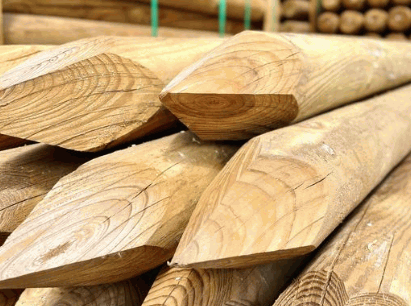
Fence Posts
Fence posts are crucial for the stability and alignment of your wood fence, ensuring it stands firm on your property.
Proper installation of fence posts is essential to maintain the structural integrity of your fence. When fence posts are securely anchored in the ground, they provide support to the entire fence structure, preventing leaning or collapsing under pressure. Additionally, choosing the right type of fence post for your specific fence design and environmental factors is crucial for long-term durability. Inadequately installed fence posts can lead to costly repairs and compromises in security and privacy. To ensure your fence serves its purpose effectively, invest time and effort in properly installing and maintaining your fence posts.
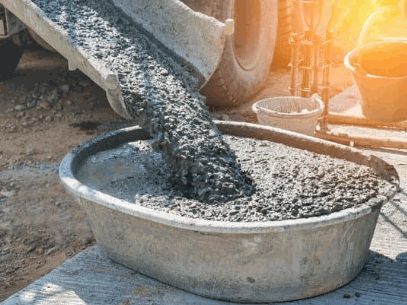
Concrete
Concrete is used to fill the post holes, providing additional stability and strength to the fence posts.
This crucial step in the installation process ensures that the fence remains upright and can withstand external forces, such as wind or accidental impacts. By securely anchoring the posts in concrete, it significantly reduces the risk of the fence sagging or leaning over time. Not only does concrete enhance the structural integrity of the fence, but it also extends its lifespan by preventing premature deterioration due to environmental elements. Its solid foundation serves as a reliable barrier, offering peace of mind knowing that the fence is securely in place.
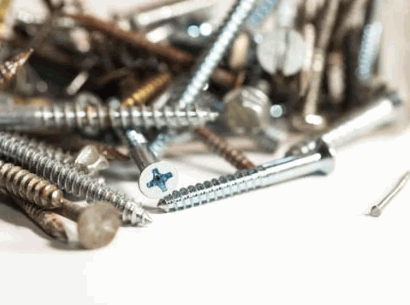
Nails Or Screws
Nails or screws are essential for assembling the wood panels and securing them to the fence posts.
In construction, nails and screws play a vital role in ensuring structural integrity and durability. Nails, typically made of steel, are commonly used for fastening lighter materials, providing a quick and cost-effective solution. On the other hand, screws offer a tighter grip and are ideal for heavier loads or projects where disassembly may be required. They come in various types such as wood screws, drywall screws, and concrete screws, each tailored for specific applications.
Choosing the right fastener is crucial, as it can impact the overall strength and longevity of the structure. For instance, galvanized nails are resistant to rust and are suitable for outdoor projects, while self-drilling screws are convenient for fastening metal components.
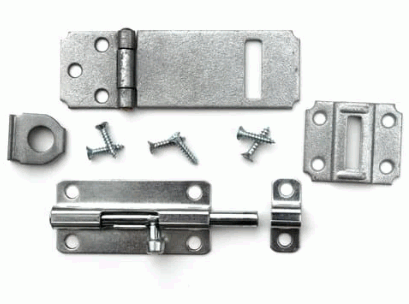
Gate Hardware (If Applicable)
Gate hardware is necessary if you plan to include a gate in your wood fence for added functionality and access.
There are various types of gate hardware that serve different functions in ensuring the smooth operation and security of your gate. Hinges play a crucial role in allowing the gate to swing open and close properly, while latches provide a secure way to keep the gate closed when needed.
Additionally, gate locks offer an extra layer of security by preventing unauthorized access to your property, especially important for safeguarding your home or business. Handles and pulls not only enhance the gate’s aesthetics but also make it easier to open and close.
What Tools Do You Need To Install A Wood Fence?
To install a wood fence efficiently, you will need several essential tools, including a hammer, drill, saw, level, and tape measure.
Hammer
A hammer is used to drive nails into the wood panels and posts, ensuring a secure connection.
Regarding installing various structures or completing woodworking projects, the role of a hammer is essential. It serves as a fundamental tool in the construction industry, offering a simple yet effective way to join materials together. Hammer strikes provide the necessary force to secure components firmly in place, creating durable bonds that withstand the test of time. Whether you are building a deck, framing a house, or crafting furniture, the trusty hammer plays a crucial part in achieving structural stability and integrity.

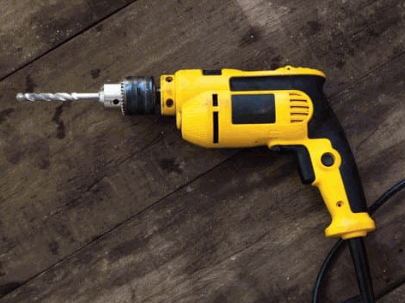
Drill
A drill is essential for driving screws into the wood, making the assembly process quicker and more secure.
When using a drill, one can easily adjust the speed and torque settings to suit the specific type of screw and wood being used, ensuring a precise and controlled installation. Drills offer the convenience of quick bit changes, enabling seamless transitions between drilling holes and driving screws.
Compared to using a hammer, where accuracy and consistency may be compromised, a drill provides a more efficient and accurate way to secure materials. The controlled power of the drill helps prevent stripping or damaging screws, resulting in a neater and more professional finish.
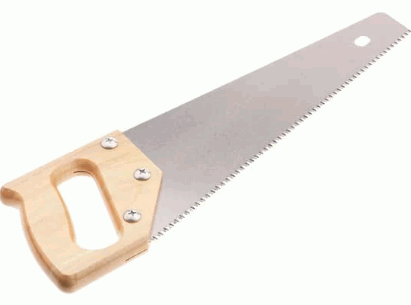
Saw
A saw, whether a circular saw or handsaw, is necessary for cutting wood panels and posts to the required sizes.
There are various types of saws that can be used for different purposes when working on a project. For instance, a circular saw is perfect for making straight and precise cuts, while a handsaw is more suitable for smaller, detailed cuts or when working in tight spaces. A miter saw is excellent for creating angled cuts, which are often needed during the installation process.
To ensure accurate and smooth cuts, it’s essential to use sharp blades and secure the material properly before cutting. Using a clamp or holding the material firmly in place can prevent any unnecessary movement that may lead to inaccuracies.
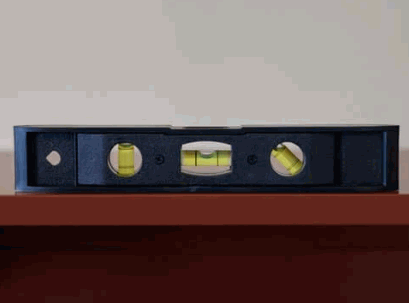
Level
A level is used to ensure that your fence posts and panels are aligned correctly, which is vital for the fence’s overall stability.
When installing a fence, using a level is not just a matter of preference, it is a necessity. The correct alignment of fence components is crucial in ensuring that the fence stands strong against various external forces like wind and pressure. By placing the level on the posts and panels, you can easily identify any deviations from the desired alignment.
Failure to maintain proper alignment can result in a fence that is not only visually unpleasing but also structurally weak. Uneven panels can cause stress points that may lead to premature deterioration or even collapse in extreme cases.
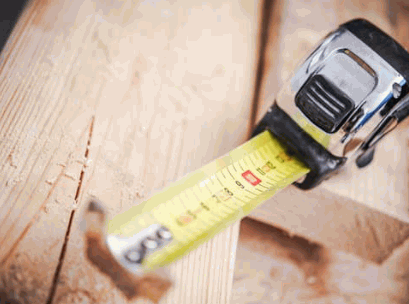
Tape Measure
A tape measure is crucial for taking accurate measurements to ensure that your fence is properly planned and executed.
When using a tape measure, always start by ensuring that it is fully extended and locked in place to avoid any distortion in the measurements. Measure twice, cut once is a fundamental rule in carpentry, emphasizing the importance of precision. When measuring, read the measurement from the bottom of the tape for accuracy. It’s important to maintain a firm grip on the tape measure to prevent it from slipping, leading to inaccurate readings.
Step-By-Step Guide To Installing A Wood Fence
This step-by-step guide will walk you through the entire process of installing a wood fence, from preparing the area and digging post holes to attaching the panels and adding the finishing touches.
Prepare The Area
The first step in installing a wood fence is to prepare the area, which includes clearing debris and reviewing the plot plan to ensure proper placement.
Once the area has been cleared of debris and any existing vegetation, the next crucial task is marking the boundaries where the fence will be placed. This involves using measuring tools to delineate the start and end points, ensuring that the fence will be aligned perfectly. Taking the time to accurately mark the boundaries will help avoid any issues during the actual installation process.
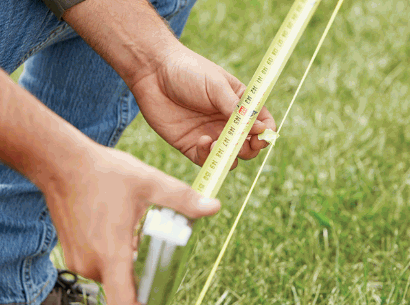
Measure And Mark The Fence Line
Using a tape measure, measure and mark the fence line to ensure that your wood fence is installed accurately and aligns with your property boundaries.
When measuring the fence line, make sure to start from a fixed point, such as a corner of your property or an existing structure. This will help maintain consistency throughout the process.
Marking the boundaries can be done using stakes or spray paint to clearly indicate where the fence will be placed. It’s crucial to double-check the measurements to avoid any errors, as accurate measurements are vital for a successful fence installation. Additionally, maintaining a straight line can be achieved by using a string line or a long, straight board as a guide.
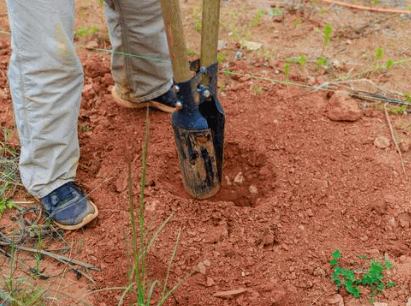
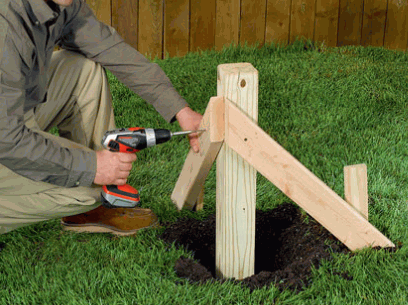
Dig Post Holes
Digging post holes is a critical step that involves using a post-hole digger to create holes for the fence posts, which will be filled with concrete for stability.
To begin the process, mark the locations for the posts using stakes and string to ensure they are spaced evenly. Using a post-hole digger, start digging the holes ensuring they are at least one-third of the total length of the post deep and twice the width of the post. This depth and width provide the necessary stability for the fence. After the holes are dug, place the posts inside and fill them with concrete. Make sure the posts are level and properly aligned before the concrete sets to avoid any issues with the fence’s structure.
Set Fence Posts
Setting the fence posts involves placing them into the dug holes, ensuring they are aligned correctly, and securing them with concrete.
Once the fence posts are positioned in the holes, it’s crucial to double-check their alignment using a level to ensure they are perfectly straight. Any misalignment at this stage can lead to issues down the line, such as a crooked fence. Waiting for the concrete to set is a vital step in the process. Allow ample time for the concrete to cure and harden before attaching any fencing materials or applying pressure to the posts. Rushing this step can compromise the stability and longevity of your fence.
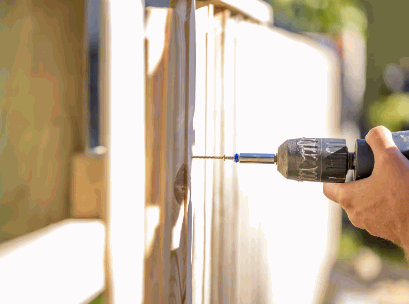
Attach Wood Panels
After the posts are set, you can attach the wood panels to them using nails or screws to form the main body of the fence.
To ensure the panels are level, start by placing a level across the top of the first panel before securing it. Once you’ve confirmed its level, drive nails or insert screws through the panel into the post.
For stability, consider using a nail gun for a quicker and more precise application. Make sure to space the nails or screws evenly along the panel for uniform support.
Avoid over-tightening the screws, as this can cause the wood to split. Use a drill with a clutch or set it to a lower torque to prevent this.
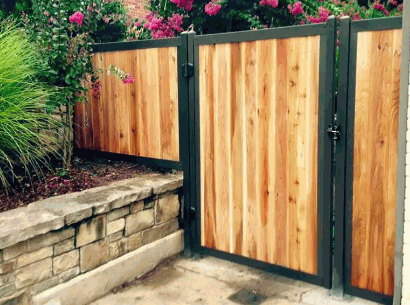
Install Gate (If Applicable)
If your fence design includes a gate, install it by attaching the gate hardware to the designated posts and ensuring it operates smoothly.
Once the gate hardware is securely attached to the posts, it’s crucial to check that the gate swings freely without any obstructions. Adjust the hinges if necessary to ensure smooth movement. Proper alignment is key to a functional gate, so use a level to make sure the gate is hanging plumb. This will prevent any dragging or sticking when opening and closing.
- After confirming the gate swings smoothly, add the latch mechanism. Make sure the latch aligns properly with the strike plate on the fence for secure closure.
- Test the latch multiple times to ensure it securely holds the gate closed. If needed, adjust the latch tension for a snug fit.
For a finishing touch, consider painting or staining the gate to match the rest of your fence. This not only enhances the visual appeal but also provides protection against the elements, increasing the gate’s longevity.
Finishing Touches
The final step is to add finishing touches such as applying paint or sealant to protect the wood and enhance the fence’s appearance.
Regarding finishing a wooden fence, choosing the right type of finish is crucial. For outdoor fences, opt for a finish that is weather-resistant and offers protection against UV rays and moisture. Water-based finishes are often preferred for their eco-friendly nature. Before applying the finish, ensure the wood is clean and dry to allow for better adhesion. Consider the natural color of the wood and whether you want to preserve it or change it with a pigmented stain. A clear finish will maintain the wood’s natural beauty, while colored finishes can complement your property’s aesthetic.